Grief Group & Gelli Art Photo 'Transfer'


Using a photo which holds a significant memory is a helpful tool in so-called art therapy and one's journey through grief. In the example here, the mother of a teen who was killed last year works with a photo she took while she was taking her son on a ski trip. She had asked her son to roll down car window and lean way back so she could take a picture of the scene they were driving past making the slow climb up the steep mountain road. As a symbol, the artwork doesn't need to exactly duplicate the actual scene; rather the shapes of the symbols point to something bigger than "just" the trees. In this example, the trees symbolize the special times that she has had with her son at their mountain retreat. The mother used black paint for the first imprint (below); washed the gel plate and used purple (on of her son's favorite colors) for the second round (left).
Place the photo in an acetate sleeve and tape to work table. Position gel plate. Mix retarder into your acrylic paint to slow down the drying process and then quickly paint your image using a generous application of paint. 
Press a sheet of watercolor paper and pull the print. The "trees" image shown below was printed onto a page previously prepared with a gel imprint with silver acrylic and a stamped image to suggest the texture of snow. You could pull a second "ghost" print; spritz the plate with water and them pull a third and possibly fourth print. Adhere the mono prints into an altered book art journal as backgrounds for future reflection.


Someday: Art Journaling to Synthesize Learning

When I took a six-hour workshop on generations theory related to my vocation as a pastor, the presenter said he'd shoot out information like a fire hose. That's exactly what happened. I created this journal entry as my synthesis of what I'd learned and what I ultimately will share with my congregation. The journaling process will be my visual sermon and ongoing reference tool.
I chose a previously prepared page of greens and blues one white gesso with a single tree steps on the middle right which symbolizes creation and the tree of life. The trees across the bottom symbolizes creation on general. Collectively the represent the generosity of God from the beginning of time. Next I added four crosses, one for each of the four phases of (financial) life in middle class America and the excuses given why not to be generous givers. Of course the crosses also symbolize the ultimate generosity of God in Jesus Christ. I wrote the life category on each cross and the excuses given in each life phase around the cross. This contraats our lack of generosity against the abundant generosity of God. 
It occurred to me during the art reflection that most middle class people earn considerably more at the first three life phase and even at retirement have much more net income than during the first two phases. The gold acrylic bottom right represents that income increase. 
I added bold type details of what I wanted to remember for future teaching and preaching. 

Purple Water Lily Mono Print Variations


First run/original pulled imaged.

I used the photograph of the water lily as my guide print for a mono print. In the spirit of total art experimentation, I pushed the art envelope to see how many variations I could create from just one Gelli Art mono print "original" painting. I came up with the following five options from just one round of "first run" painting on the plate:

  1. Original printed onto prepared background.
  2. Ghost of original printed onto a second prepared background.
  3. White acrylic brayered over leftover paint after previous two prints had been pulled; use fresh paper which doesn't have any previous printing.
  4. Heavy spritzing of water onto leftover from above; enough so paint runs; press using fresh paper.
  5. Final print on fresh paper to soak up the remainder of the watered down acrylic. You could press using fresh paper or add this as another layer to a previously printed sheet.
"Ghost" image with 2nd pressing of subject onto prepared background.
Third print: white acrylic over leftover paint; pulled on fresh sheet.

Fourth print onto heavily spritzed with water gel plate.

Fifth print with the leftover watered down acrylic.


Pink Lily Mono Print Variations

First run mono print.

There are several possibilities for using up the excess acrylic on the Gelli Art plate after pulling the first "Plan A" print. Of course there's always the basic "ghost" print. Press a prepared sheet of paper onto the leftover paint and see what you can pull up. In the example here, I cover the leftover paint on the gel plate with thick white acrylic paint. After applying with a brush to generally coat the plate I ran a brayer over it to smooth the surface. Take a fresh piece of paper and pull the image. You will get much of the leftover paint up from the flower plus a soft look with the white paint.
Cover the leftover paint with white acrylic; roll smooth with a brayer.


Water Lily Acrylic as a Gelli Art Mono Print

A fun way to incorporate the photo into a journal page is to use the photograph as a "guide print" for a mono print from a gel plate. Begin by sizing a digital photograph so that it fits underneath your printing/gel plate. I opted to use my 8" x 10" gel plate so the print here is slightly smaller. (My inkjet printer is B&W which is why the print is B&W. I then referred to the digital image on my cell phone if I needed a color guide.) Slip the inkjet print into an acetate sleeve to project the gel plate and the print. Tape the acetate sleeve to your work table so it doesn't slip around and top with gel plate. Once this is situated, you're ready to begin. I wanted to make a two-pass mono print with the background printed first and the subject (flower) second.
 I used acrylic paint for the background and subject. Because acrylic dries pretty fast, it is necessary to add a few drops of "extender" to each color of paint; stir, then apply the paints as usual. You will still need to work fairly quickly, so have everything you need all laid out and ready with a basin of water nearby to drop in the various tools that you use. I painted the lily and the leaves and then lined up the previously printed background and "pulled" the subject onto the background.
Ready to lay down the paper and pull the print.
Extra paint left after the first print was pulled.

The completed mono print which I then adhered to a double-page spread in my art journal.


Gelli Art Page Assembly

I've found that the best way for me to use Gelli Art mono printing is as background pages for art journals.
 Generally I add them to my current art journal the same day I've made them; or at the beginning of my next art session.
I use a Rotatrim paper cutter to cut to a size a bit smaller than my journal page; fold it in half (or where I want the seam to be). Then I use an ATG double-stick tape gun to tape the edges of what will go on the right side of the jounal page. 
Shove the taped/folded edge into the seam of the journal & gently roll it down. Then use the ATG gun to tape the back of the left half of the gel print and gently close the journal page. 
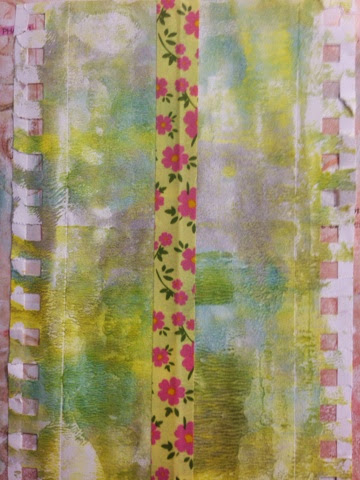
This seems to allow for a smooth adhesion of the taped page. I patch together extra strips to fill more journal pages...no point wasting any of the printed page! Add wasi tape as desired. 

International Lily Festival

What a joy to see the amazing collection of lilies in San Angelo at the public lily gardens. Free parking. Free admission. Amazing & diverse selection of lilies. I photographed these at twilight when most of the flowers had closed up for the night. I'm looking forward to an early post-dawn photo shoot.


Background Quickies


Art definitely takes time. It is difficult to look at the clock and say, "I've got 25-30 minutes to spare; I'll sit down and do art." Creativity doesn't always fit that forced time constraint. Of course there are exceptions, and making mono print backgrounds is one such exception. I made five very different backgrounds in 25 minutes which included cleanup afterwards.
I've got one art journal dedicated to receiving these Gelli Arr backgrounds so I'm set & ready to work on middle layers on the next road trip. The art messiness will be done so when I have more time I can work on the reflective messinessthat takes more (quiet) time.


Revisiting an "Old" Journal Entry

Part of artsy theology journaling is the mixed media art of thoughtful reflection a second time around. I was looking for a space to experiment with a new art media that works well on black paper so I flipped through the pages of my current journal to find something with a little open black space.
Then I filled in all the black space with three colors with the SoufflĂ© Pen. Of course this mindless doodling also allows time to reflect, rethink, and REMEMBER insights possibly missed the first time around. 
The final touch on my revisit was to (re)write the headlines from the lessons learned the first time around: rewrite and remember. 

Stenciling with Thick and Thin

To add a third dimension to the flat journal page I used medium artist gel over thick and thin stencils. The "thick" ones are made out of acrylic & generally intended as "drawing helps" and include lettering stencils & stencils with small simple shapes.
Use a plastic tool to fill in the stencil & scrape it smooth across the top before carefully lifting stencil. Let it dry overnight. To make the production (of waiting for it to dry) more worthwhile I did one in each of my four current art journals.
Stencil for lettering are "thick" so it fills up with a lot more artist gel. These stencils also slide around less as you're working with them. 
The super-thin stencils found in the stenciling section of an art store are generally intended for use on a wall or with mixed media art. Generally you'd spray the back with repositionable mounting adhesive so they don't slide around. I didn't spray; I simply was as careful as possible to ensure the stencil didn't slip. The amount of medium required is much less; the end result "thin" on the journal page. 
Once the gel dries (clear) you can paint and stamp and collage around/over as desired. 


Honoring Past Art

When I relocated from my combo art corner/office I uncovered a stack of art I had made circa 2002 when I had been in transition from portrait photographer to mixed media artist. I was (and am) fascinated with the image transfer (to 12"x12" and larger granite tile) mixed media.
Many in the pile are finished, but several had been completed in anticipation of a scheduled art show. I wasn't sure what I would, could, or should do when these recently rediscovered art pieces. They are heavy and somewhat unworldly because of the granite. When a friend gave me a china hutch type unit it was the perfect solution and a way to honor the art and travel memorabilia from my "past life" before my academic & ministry vocation. My old art now has a pretty home and it also continues to inspire me with mixed media art options...now in my artsy theology journal instead of framed pieces & art shows.