Altered Book Basic Prep

I save the inside/opening pages of an art journal to "summarize" what follows. For this newly completed art journal I created a collection of completed pages overlayed on top of basic "how-to" tips for beginners.The opening page becomes a hint of what follows as well as a reminder (to the artist) of insights gained.
Background is a collage of blues glued with acrylic medium.

1.       Choose a hardback book with thick/sturdy pages; the content might relate to the theme of your journal and you then integrate the words/pictures with your work OR it might have nothing to do with the journal and the pages and cover are entirely covered so there is no sense of the original text/book.
2.       Cover the journal cover—first or last; your choice. Cover the inside front and back covers to hide the material used to cover the exterior.
3.       Tear out pages—leave 15-20 pages throughout the entire book.
4.       Generic background preparation—experiment with techniques and use various media and colors to partially cover half to two-thirds of the pages; leave the rest to do later as you learn new ideas.
a.       Black gesso—leaving a few key words/phrases exposed
b.      White gesso— leaving a few key words/phrases exposed
c.       Watercolors and/or covering a page with large background stamps
d.      Acrylics
e.      Pastels
f.        Pencils
g.       Translucent papers/napkins
5.       Choose a theological theme/reflection
6.       Integrate with a specific art technique
a.       Image transfer prayer labyrinth on a page that has been covered with watercolors—use as prayers of the people past/present/future
b.      Soap on black gesso with colored pencils—Bible verse/story; listening to God
c.       Subtract text
d.      Doodle edge
e.      Rubber stamping combined with watercolors and theological words
f.        Stacked journaling (wax resist)—heart wounds or sermon/teaching prep

g.       Collage—pretty papers; magazine clippings/words; stamped words; stacked journaling


 I added mini pictures of previously completed altered book pages and then selectively hand colored some of the images with colored pencils.
The completed page.
An oceanside view for artsy theology: Los Cabos, Mexico.

Simple Background Stencil


I wandered up and down the aisles of my local Hobby Lobby looking for unexpected sources to create textured patterns for backgrounds. I found a roll of fabric mesh in the wedding section. I'm not sure how brides use this product, but it makes a lovely background when painted over with acrylic glaze (or watercolors). Allow to dry and you have interesting texture for a journal page...or future art extravaganza.

Stencils and Watercolors

Rug canvas as a stencil.
 A trip to your favorite arts and crafts store will generate lots of fresh ways to create background textures. Then experiment with color and stencil combos in your art journal to figure out what YOU like the best.  I was personally most excited about the pattern from the "rug canvas" I found in the craft section at Hobby Lobby. I bought a big piece so I could use it for large projects. I also like the pattern from a wire screen used to run a (latex house paint) roller.
Rug canvas with stencil lettering.

Screen used to run a (household paint) roller.

Stenciling over the rug canvas stencils.

Circle stencil closeup on top of paint roller screen stencil


Bubble Bath and Food Color for "Bubble Bubble"


 For an interesting background and a (messy) fun project try "Bubble Bubble" by adding bubble bath to a cup of water and then using a straw to (literally) blow bubbles so they overflow onto watercolor paper. Then add drops of food coloring on the bubbles and wait for the bubbles to settle down and bubble patterns to form on the watercolor paper. Repeat with as many bubbles & colors as you desire.
Adding food coloring to bubbles on a piece of watercolor.
Use a straw to blow bubbles until they literally overflow.

Add drops of food color and (patiently) wait for bubbles to settle.


Blowing bubbles to add additional bubbles...and colors.


Messy!

The completed piece is a fun end product or it can be incorporated into another art project.

Shaving Cream and Food Coloring

Shaving cream & food coloring "transfer" image.
Squirt shaving cream on smooth surface.
 An energetic teenager was aching to show me the "super cool" art technique she had learned in high school art class, so she brought the supplies: shaving cream and food coloring. I supplied the watercolor paper. The process really is amazing. It is a bit messy, but amazing nonetheless. Squirt shaving cream on a smooth surface-something non-porous that can be easily cleaned up. The paper we used is coated on the "wrong side" with plastic; we placed it plastic side up on the table. Smooth it to the size of your page and then squirt with a few drops of food coloring in desired colors. Take the "wrong end" of a skinny paintbrush and doodle in the food coloring & shaving cream. Place watercolor paper (or journal page) face down on the shaving cream & gently rub. Lift a few moments later and scrape off excess shaving cream. Blot dry with a paper towel. The transfer is instant...and vibrant.


Doodle in the shaving cream and food coloring.

The finished food coloring doodle.

Lay the paper face down on the shaving cream & food coloring; press gently.

Lift carefully after a few moments and scrape off excess shaving cream. Dab dry with paper towel.

The image transfers almost immediately with the same vibrancy as the food coloring.


The same shaving cream & food coloring can be "re-smushed" for a softer 2nd press with fresh paper.


Menagerie of Watercolors

Dig out every corner of your art supplies and see how many different types of watercolors you have collected. I have some I use for travel only, others that are my studio staple, and still others that I had never used. Create a project to systematically test your watercolor variations to see what you really like best...and why. And possibly, what you can pass on to someone else because you don't need/use it.
Grumbacher (L) and Master's Touch (R)
I compared similar colors between different brands; I also compared translucent to opaque. It was an interesting experience to discover first-hand (any) differences.

Saran Wrap Watercolor SMUSH

 
Saran/plastic wrap is a quick and easy way to create a marbled look on watercolor for an interesting background with texture. Begin with a watercolor wash of your desired color-make sure it is very wet. Cover with plastic wrap (the more wrinkles the better) and allow to dry. Remove wrap. Voila! Texture. Once the first color is completely dry, add a second color as desired.
Wet watercolor wash
Plastic wrap on wet wash


Allow to dry then lift plastic wrap

Add a second color with a second Saran wrap smush as desired once first color has completely dried.


Watercolor Product Testing

A variety of watercolors to test...and see.
 Do you ever buy art supplies and then just flat never get around to using them? That would be me! I decided it was time to systematically test the various watercolors that I've purchased and compare the differences between (a) types of products like dry vs. tube; (b) brands; and (c) styles of watercolor(ing) like Chinese Mahjong tiles and glitter watercolors. This is the perfect use for an artist journal. Break out a fresh page or two and test out each product type and color. I made some important
Mahjong tiles give a very soft effect.
 discoveries (for me): the cheap watercolors that I hadn't bothered to use are actually now my favorites; the Mahjong tiles which I purchased because I love the distinct colors actually have a totally different flow; and the watercolors in tubes have the potential for super vibrant colors equivalent to poster paints. The watercolors which had been my favorites have now slipped to the back burner.
This cheap set is my NEW favorite.

The vibrancy of these tube watercolors is incredible.

Artsy Theology: The Art of Theological Reflection

 The already prepared background of watercolor on white gesso with the exposed words "never alone . . . God is with you" suited my desire to identify the various art techniques that I use (left) together with theological themes for reflection (center) and specific uses for journaling (right). It is helpful to name the variety of uses for "artsy theology" and also to see the diverse mixed media which can be used for "the art of theological reflection." The possible combinations with mixing & matching art technique with theological theme with the type of journaling are limitless!

Brainless Backgrounds & Schlep Prep

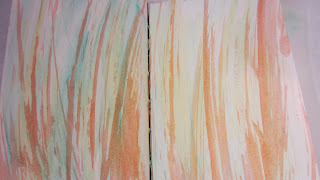
 In preparation for launching my 2014 sermon journal I did some brainless backgrounds to schlep prep to take my journal to upcoming lectionary (Bible study) meetings. It was an opportunity to experiment with a "new" art gadget I'd bought a few months ago but had never taken the time to fiddle with it: Derwent Inktense Blocks. They are water soluble-simply scrape the block with the mini grater and add water to the desired color density.
 Then I experimented with a variety of brushes and changed up whether the brushes was wet & loaded with paint or barely dipped and fairly dry; likewise varying whether the page was wet or dry when I began to paint. Overall I varied: wet on wet; dry on wet; dry on dry. I force-dried the pages with a hairdryer and kept right on schlepping out the backgrounds for a very productive hour. Nothing fancy-but experimenting was done, quiet time enjoyed, and many pages are now prepped and ready for sermon journaling in the weeks ahead.